Using SVG Files with Cricut: An Easy 5-Step Beginner’s Guide
Learning how to start using SVG files with Cricut is the most exciting step after you get your new machine! You’ve unboxed it, you’re staring at it, and you’re dreaming of all the amazing projects you can create. But there’s one little hurdle that can feel intimidating at first: how do you actually use those beautiful designs you find online (like our SVG freebies!) with your machine?
The answer is an SVG file, and we’re here to show you just how easy it is. In this simple, step-by-step guide, we’ll walk you through everything you need to know. You’ll be a pro in no time!
A Beginner’s Guide to Using SVG Files with Cricut
First, let’s quickly explain what an SVG is. Think of it as a smart set of cutting instructions for your Cricut. Unlike a regular image (like a JPG), which is made of pixels, an SVG file is made of lines and points. This tells your machine exactly where to cut, giving you perfectly crisp and clean results every time. It’s the secret to professional-looking projects!
Your 5 Steps from Download to Done
Here is the entire process broken down into five simple steps.
Step 1: Download & Unzip Your File
When you download a design from a site like ours, it will usually arrive as a .zip file. This is just a compressed folder used to keep all the different file types (SVG, PNG, etc.) together.
- Find the downloaded
.zipfile on your computer (usually in your “Downloads” folder). - Double-click the folder to “unzip” or open it.
- Inside, you will see several versions of the design. The one you need is the file that ends with
.svg.
Step 2: Upload the SVG to Cricut Design Space
Now, let’s get that file into the Cricut software.
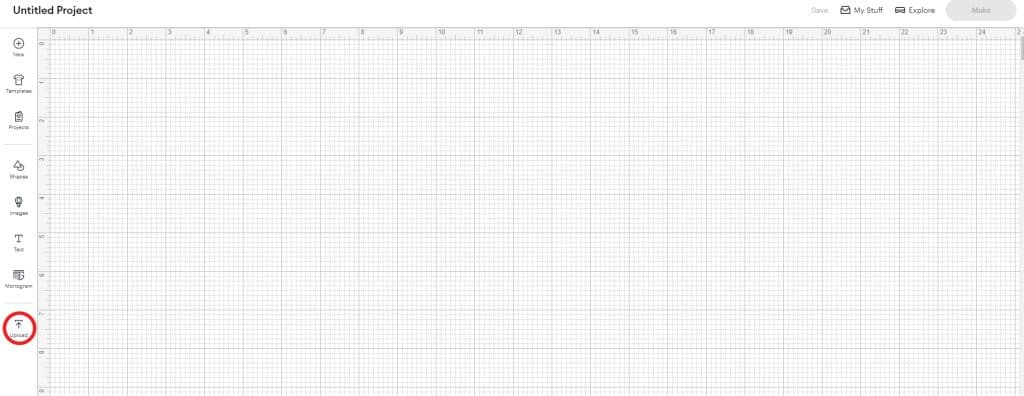
- Open Cricut Design Space and start a New Project.
- Click the
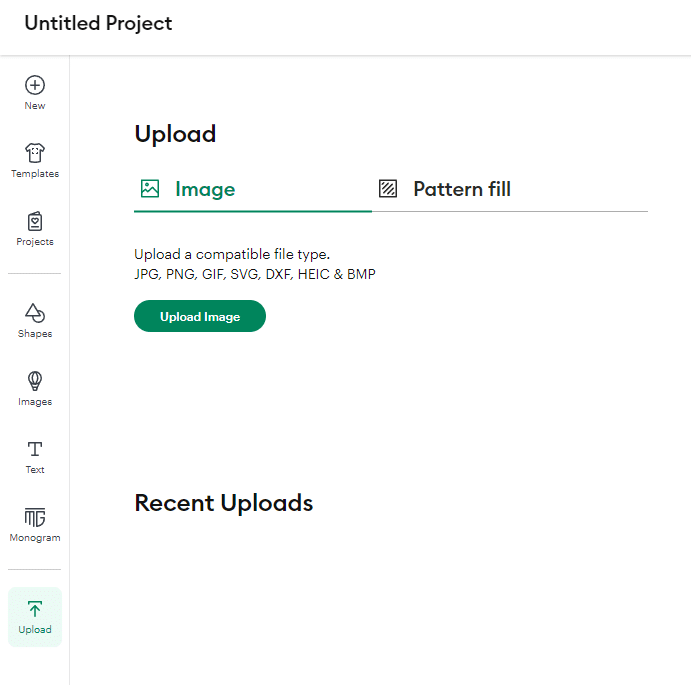
Uploadbutton, located in the toolbar on the bottom left. - On the next screen, click
Upload Imageand thenBrowse. - Find the
.svgfile you just unzipped and select it. - You’ll see a preview of the design. It should look clean and ready to go. Click the green
Uploadbutton in the bottom right. - Your design will now appear under “Recent Uploads.” Click on it to select it, then click
Add to Canvas.
Step 3: The Most Important Step: Attach Your Design!
Have you ever uploaded a word and then, on the cutting mat screen, all the letters are jumbled up and out of order? It’s a super common and frustrating problem for new users, but there’s a simple fix!
Before you do anything else, you need to tell Cricut to keep all the pieces of your design locked together in their correct positions.
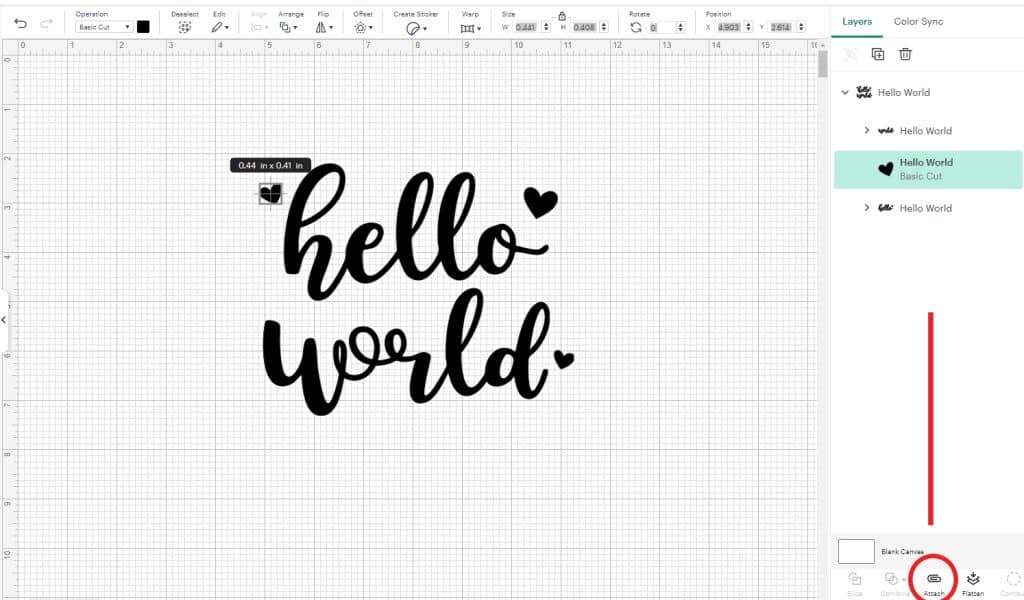
- Make sure your design is selected on the canvas (it will have a box around it).
- Look at the bottom of the Layers Panel on the right-hand side.
- Click the
Attachbutton (it looks like a paperclip).
That’s it! This one click “paper-clips” all the parts of your design together, ensuring it cuts out exactly as you see it on your screen.
Pro Tip: What’s the difference between
AttachandWeld? UseAttachto keep separate shapes locked in place (like the letters in a word). UseWeldfor script fonts to melt the letters into one single piece, removing the cut lines between them. For most of our designs,Attachis all you need.
Step 4: Resize Your Design
Your design is now on the canvas and ready to go. Click and drag the corner of the design to make it the perfect size for your project, whether it’s for a t-shirt, a mug, or a wall decal.
Step 5: Click “Make It!”
You’re ready for the magic.
- Click the green
Make Itbutton in the top right corner. - Follow the on-screen instructions to select your material (like vinyl or iron-on), load it onto your cutting mat, and start the cut!
And that’s it! You’ve successfully learned the basics of using SVG files with Cricut. It might seem like a lot of clicks at first, but after you do it once or twice, this process will become second nature.
Ready to try it yourself with a simple, fun project?
➡️ [Download our “Charming Hello World” Free SVG Cut File here!]
It’s the perfect single-color design for your very first project. Happy crafting!
Where Else To Find Me
My Zazzle Shop
Find personalized gifts and unique designs, all created by me and available on Zazzle.
Spoonflower
Shop my exclusive collection of surface pattern designs on fabric, wallpaper, and home decor.
PrintablePretty.co
Sister website dedicated to showcasing my designs from Zazzle.
SonyaBernhart.com
Portfolio website showcasing my surface pattern designs.